How to Charge a 2025 Ford F-250 Battery: A Comprehensive Guide
The 2025 Ford F-250 is a powerhouse, packed with the latest technology, enhanced performance, and reliability. Like any modern vehicle, it relies heavily on a functional battery to power everything from the engine to the electronics. Knowing how to charge the battery properly is an essential skill for any F-250 owner, especially if you run into an issue where the battery needs a boost or replacement.
In this guide, we will walk you through how to charge a 2025 Ford F-250 battery safely and effectively. Whether you are a DIY enthusiast or someone who simply wants to avoid costly mechanic visits, this article provides step-by-step instructions to help you maintain your truck’s battery health.
Understanding the 2025 Ford F-250 Battery System
Before diving into the charging process, it’s important to understand the key components of your F-250’s battery system.
The 2025 Ford F-250 comes equipped with a 12-volt lead-acid battery, like most modern vehicles. This battery powers not just the ignition system but also a wide range of features including the radio, headlights, power windows, and onboard computers. Over time, the battery’s charge can diminish due to various factors, such as extended periods of inactivity, cold temperatures, or heavy electrical loads. Knowing how to charge the battery properly ensures that these components continue to work seamlessly.
Tools You’ll Need for Charging the Battery
To charge the battery safely, you will need a few essential tools:
- Battery Charger or Jump Starter: If you’re charging the battery directly, a reliable battery charger is necessary. A jump starter can also serve as a temporary charging solution if you’re in a bind.
- Safety Gear: Always wear gloves and safety glasses to protect yourself from potential sparks or battery acid.
- Wrench: If you need to disconnect the battery, having a wrench on hand will make the process easier.
- Multimeter: This tool helps you measure the voltage of the battery before and after charging.
Step 1: Safety First
Before you start the charging process, ensure you are working in a safe environment. Park your Ford F-250 on a level surface and engage the parking brake. Turn off the engine and remove the key from the ignition.
Make sure the area around the battery is free of flammable materials. It’s a good idea to wear gloves and safety glasses while working around the battery, as it can emit harmful gases.
Step 2: Locate the Battery
In the 2025 Ford F-250, the battery is typically located under the hood. However, depending on the trim and configuration, some models may have dual batteries. To find the battery:
- Open the hood of your F-250.
- Look for a rectangular component that is secured by metal brackets.
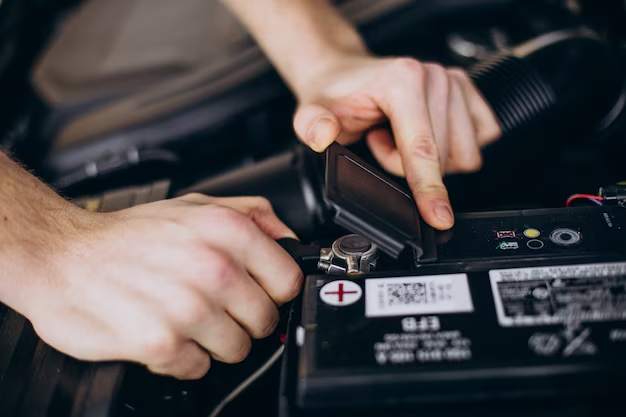
- Identify the positive (+) and negative (-) terminals of the battery. These are typically marked with red (positive) and black (negative) covers or stickers.
Step 3: Inspect the Battery
Before charging, it’s essential to inspect the battery for any visible signs of damage. Check for:
- Corrosion around the battery terminals (white or greenish buildup).
- Cracks or leaks in the battery casing.
- Low fluid levels (if applicable to your type of battery).
If you notice any cracks or leaking fluid, it’s best to replace the battery rather than attempt charging. A damaged battery is unsafe to use.
Step 4: Disconnect the Battery (If Necessary)
In some cases, it may be necessary to disconnect the battery before charging, especially if you plan on using a battery charger that requires direct contact with the terminals.
- Disconnect the Negative Terminal: Use a wrench to loosen the bolt on the negative terminal (marked with a minus sign). Remove the cable and place it away from the battery to avoid accidental contact.
- Disconnect the Positive Terminal: Now, loosen and remove the positive terminal cable (marked with a plus sign).
Note: If you are using a jump starter or your truck is equipped with a smart charging system, you may not need to disconnect the battery.
Step 5: Connect the Battery Charger
Now, it’s time to connect the charger. Here’s how to do it correctly:
- Set the Charger to the Right Voltage: Ensure your charger is set to the correct voltage (typically 12V for the 2025 Ford F-250).
- Connect the Positive (Red) Cable: Attach the red (positive) cable from the charger to the positive terminal of the battery.
- Connect the Negative (Black) Cable: Attach the black (negative) cable to the negative terminal of the battery.
Step 6: Charging the Battery
Once the cables are securely connected, plug in the battery charger. If you’re using a smart charger, it may automatically detect the battery’s charge level and adjust accordingly. If not, refer to the charger’s manual to set the correct charging rate (typically 2-10 amps, depending on your battery’s size and charge level).
- Charging Time: The time it takes to fully charge a 12-volt battery depends on the charger’s amperage and the battery’s current charge level. A fully discharged battery could take anywhere from 6 to 12 hours to recharge, while a partially drained battery may only need 1-4 hours.
- Avoid Overcharging: Many modern chargers come with built-in overcharge protection. If you’re using an older charger, monitor the battery’s progress and disconnect the charger once it’s fully charged.
Step 7: Monitor the Charging Process
While the battery is charging, it’s important to keep an eye on the charger’s status. If you notice any unusual behavior, such as excessive heat, sparks, or an odor, stop charging immediately and inspect the battery.
Step 8: Disconnect the Charger and Reconnect the Battery
Once the battery is fully charged, follow these steps:
- Turn off the Charger: Before disconnecting any cables, turn off the battery charger to avoid any electrical surges.
- Disconnect the Negative Cable: Always disconnect the negative (black) cable first.
- Disconnect the Positive Cable: After the negative cable is removed, disconnect the positive (red) cable.
If you had disconnected the battery earlier, reconnect the positive cable first, followed by the negative cable. Tighten both connections securely.
Step 9: Test the Battery
After reconnecting the battery, start the truck to ensure the battery is functioning correctly. If the truck starts without any issues, the battery has been successfully charged.
If the truck fails to start, it may indicate a more serious issue with the battery or the charging system. In this case, consult a professional mechanic or visit a Ford dealership for further diagnostics.
Step 10: Routine Battery Maintenance
To extend the life of your 2025 Ford F-250’s battery, it’s essential to maintain it regularly. Here are a few tips:
- Clean the Battery Terminals: Periodically check and clean the battery terminals to prevent corrosion buildup. Use a mixture of baking soda and water to gently scrub away any residue.
- Inspect for Damage: Regularly check for any signs of wear, cracks, or leaks in the battery.
- Check the Charge: If you’re not driving your truck frequently, consider checking the battery’s charge every few months.
Conclusion
Charging your 2025 Ford F-250 battery is a straightforward task that can save you time and money. By following these steps and ensuring you use the correct tools, you can maintain your truck’s battery and ensure its longevity. Always exercise caution, and if in doubt, don’t hesitate to seek professional assistance to ensure the safety and functionality of your vehicle’s electrical system.
FAQs on Charging a Ford Battery
1. How to Charge a Ford Battery?
To charge a Ford battery, follow these steps:
- Ensure Safety: Wear gloves and safety glasses. Park your vehicle on a flat surface, turn off the engine, and remove the key.
- Locate the Battery: Open the hood and locate your Ford’s battery. The positive terminal is usually marked with a red cover or “+” symbol, while the negative terminal has a black cover or “-” symbol.
- Prepare the Battery Charger: Set your charger to the appropriate voltage (typically 12V for most Ford vehicles).
- Connect the Charger: Attach the red (positive) cable to the positive terminal, and the black (negative) cable to the negative terminal.
- Turn on the Charger: Plug in the charger and set the charging rate (if necessary). It may take several hours to fully charge the battery, depending on its condition.
- Disconnect the Charger: Once charging is complete, turn off the charger before disconnecting the cables. Always remove the negative cable first, then the positive.
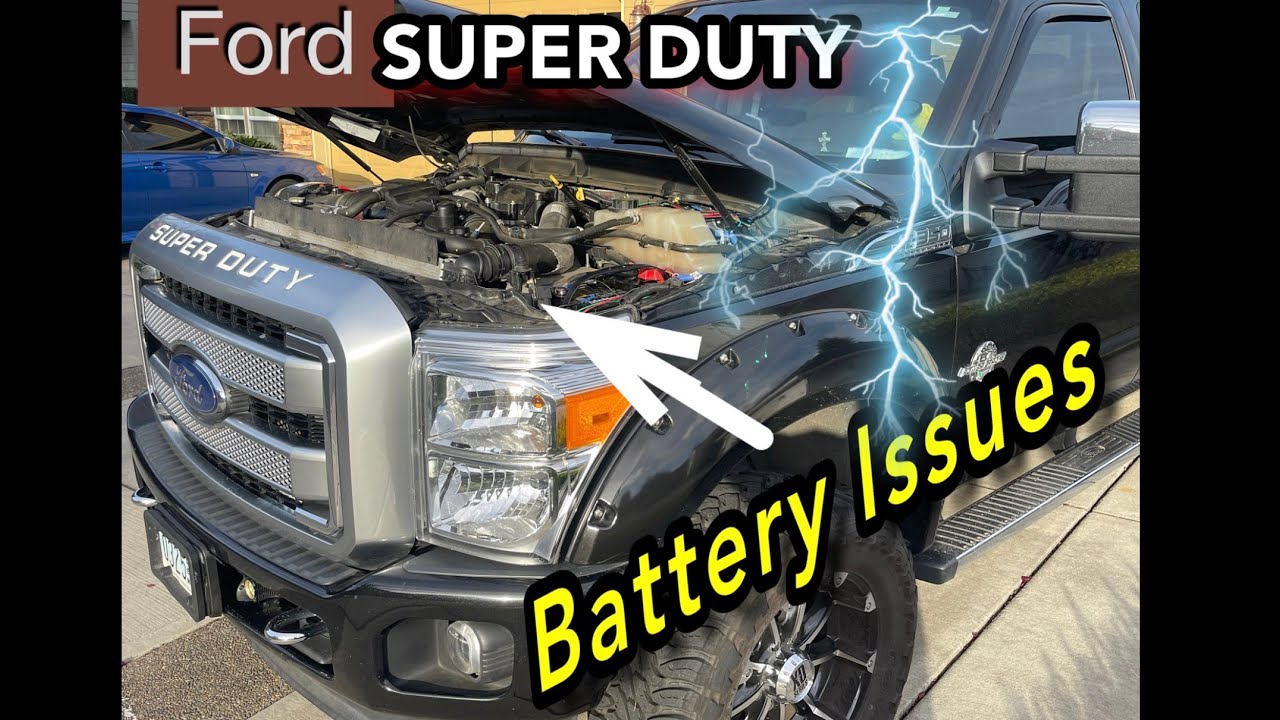
2. Why Does the Ford F-250 Super Duty Have Two Batteries?
The Ford F-250 Super Duty often comes with two batteries for several reasons:
- Increased Power Demand: The F-250, being a heavy-duty truck, requires more power to run both the engine and additional systems like lights, electronics, and towing equipment.
- Dual Battery System for Reliability: Two batteries provide redundancy. If one battery fails, the other can still support essential systems, making the truck more reliable, especially for long trips or heavy loads.
- Support for Diesel Engines: Diesel engines, commonly found in F-250 models, require more power to start due to the higher compression ratio. A dual battery system helps with the higher cranking power needed to start the engine reliably.
3. How Do You Charge a Truck Battery in Series?
Charging truck batteries in series involves connecting multiple batteries to increase the overall voltage while keeping the amperage the same. Here’s how to charge truck batteries in series:
- Identify Battery Configuration: Ensure that your truck is designed for a series battery connection (typically found in dual battery setups).
- Connect Batteries in Series: Connect the positive terminal of the first battery to the negative terminal of the second battery. Continue connecting any additional batteries in the same manner (positive to negative).
- Connect the Charger: Attach the charger’s positive cable to the positive terminal of the first battery and the negative cable to the negative terminal of the last battery in the series.
- Charge the Batteries: Once everything is connected, turn on the charger. Make sure to monitor the batteries’ charge levels regularly.
Important Note: Charging batteries in series requires careful handling and monitoring. If you’re unsure, seek professional help to avoid damaging the batteries or the truck’s electrical system.
4. How to Charge Truck Batteries?
Charging truck batteries is similar to charging a regular car battery but with some added considerations for larger vehicles. Follow these steps:
- Turn off the Vehicle: Ensure the truck is off, and remove the key.
- Inspect the Battery: Check for any corrosion or visible damage before charging.
- Use the Right Charger: Select a charger appropriate for your truck’s battery (12V or 24V depending on the system).
- Connect the Charger: Connect the positive cable (red) to the positive terminal and the negative cable (black) to the negative terminal.
- Set the Charger: Set the charger to the correct amp setting. Slow charging (2-10 amps) is ideal for truck batteries, but fast charging is possible if you’re in a hurry.
- Monitor Charging: Keep an eye on the charger’s display to ensure the battery isn’t overcharged. Charging times can range from 4 to 12 hours depending on the battery’s size and charge level.
- Disconnect the Charger: Once fully charged, turn off the charger before disconnecting the cables, starting with the negative cable, then the positive.